I've been asked: Is it hard to can your own chicken? Short answer: No!
Yes, it does require equipment, effort, and time. But the overall process isn't too complicated.
Equipment Needed:
pressure canner--to do the canning
clean jars and lids--for the canning
spatula--to get air out
towel, dishcloths or paper towel--to clean rims and to set warm jars on
labels/marker--to label jars
timer
To see how I did it: http://imstillplantingfortomorrow.blogspot.com/2013/02/taste-test-tuesday-canning-chicken.html
Showing posts with label Questions and answers. Show all posts
Wednesday, December 3, 2014
Wednesday, November 20, 2013
Wednesday Why: Researching Products
Wednesday Why: How do I research a product to determine if I want to buy it or not?
My first choice is to always try the product firsthand. Whether it is an appliance, a book for homeschool, an item of clothing or a garden tool, I like to be able to see, hold, try the product before deciding to buy it. This allows me to see if it fits, if it will work in the way I want & hope, if it seems durable, if it will be usable, etc.
But, there are many times I am not able to actually try the product--how often does [store name] let you actually use a blender before buying it, not likely. Clothing can generally be tried on, but most appliances, tools, and anything else aren't likely to be allowed a test-run before you buy it. So what do you do then?
If you have friends that have used and recommend a product, that is always helpful. But on your own, you can read customer reviews, read trouble-shooting guides to get an idea of what possible problems the product may have, try to see if there are any recalls or known defects that are common for that product--some of these pop up in customer reviews--like when many customer reviews mention the same kind of problem they had with the product (like a certain type of TV that has issues with the remote that comes with it within a short time period, or a washer that develops problems agitating after only a year, or an MP3 player that stops working after a few months).
Also, besides the actual reviews and such of the product, I try to think about the actual usage of the product. Is it something I will use often, occasionally or really only once or twice a year? Is it something that will make life easier with its use, or more complicated--finding space for it, safety issues, increasing expenditures, etc? Is it something worth storing for the few times it may be used? Is it going to pay for itself in usage, time saved, sanity saved--some items may not literally pay for themselves like some energy efficient products compared to non-energy efficient products, but because they make life easier or more manageable they pay for themselves in sanity. An example of this for me is the gamma lid for buckets--more expensive compared to the regular lids that go with buckets, but oh so much easier to use!!! Many times over have I been happy I splurged on a gamma lid over a regular bucket lid for using to store food storage--I did wait for them to go on sale of course.
I hope these thoughts help to determine what the best value for you money, time, & sanity is when buying or not buying a product as the case may be. It's true I may not do this thorough of research for every product, but have found it helpful when I do--it has saved me money as I've been able to either determine through the time, effort, and information I found I decided I didn't want the product or been able to find a better deal--meaning a better quality product sometimes for cheaper sometimes not.
My first choice is to always try the product firsthand. Whether it is an appliance, a book for homeschool, an item of clothing or a garden tool, I like to be able to see, hold, try the product before deciding to buy it. This allows me to see if it fits, if it will work in the way I want & hope, if it seems durable, if it will be usable, etc.
But, there are many times I am not able to actually try the product--how often does [store name] let you actually use a blender before buying it, not likely. Clothing can generally be tried on, but most appliances, tools, and anything else aren't likely to be allowed a test-run before you buy it. So what do you do then?
If you have friends that have used and recommend a product, that is always helpful. But on your own, you can read customer reviews, read trouble-shooting guides to get an idea of what possible problems the product may have, try to see if there are any recalls or known defects that are common for that product--some of these pop up in customer reviews--like when many customer reviews mention the same kind of problem they had with the product (like a certain type of TV that has issues with the remote that comes with it within a short time period, or a washer that develops problems agitating after only a year, or an MP3 player that stops working after a few months).
Also, besides the actual reviews and such of the product, I try to think about the actual usage of the product. Is it something I will use often, occasionally or really only once or twice a year? Is it something that will make life easier with its use, or more complicated--finding space for it, safety issues, increasing expenditures, etc? Is it something worth storing for the few times it may be used? Is it going to pay for itself in usage, time saved, sanity saved--some items may not literally pay for themselves like some energy efficient products compared to non-energy efficient products, but because they make life easier or more manageable they pay for themselves in sanity. An example of this for me is the gamma lid for buckets--more expensive compared to the regular lids that go with buckets, but oh so much easier to use!!! Many times over have I been happy I splurged on a gamma lid over a regular bucket lid for using to store food storage--I did wait for them to go on sale of course.
I hope these thoughts help to determine what the best value for you money, time, & sanity is when buying or not buying a product as the case may be. It's true I may not do this thorough of research for every product, but have found it helpful when I do--it has saved me money as I've been able to either determine through the time, effort, and information I found I decided I didn't want the product or been able to find a better deal--meaning a better quality product sometimes for cheaper sometimes not.
Wednesday, October 9, 2013
Wednesday Why: Vacuum Sealing Bread Products
Have you ever tried to vacuum seal bread or bread products? Is it possible to do so without squishing the bread? As you can see in the picture below, there is a way to seal bread and a way not too--unless you don't mind really compact bread. On the left are hotdog buns that were simply put into the vacuum sealing bag and then vacuum sealed--a big mess of mashed buns that don't go back to bun shape once taken out. On the right are hamburger buns that were first put into a ziploc bag, and as much air removed as possible, then put into a vacuum sealing bag and vacuum sealed. The buns stayed in their original shape. If you don't think you will be using bread products within a short time, you may want to vacuum seal them, but I would suggest using ziploc (or generic) bags first so that your bread doesn't get all mashed.
Other vacuum sealing hints and tips: slightly freeze meats first--otherwise the vacuum sealer will be sucking a lot of juices (blood) out of them, also they keep better shape--like bread--if slightly frozen first. Make sure the bag you are using is the proper size--too small and it won't be able to vacuum seal properly, too big and well you are wasting bag--unless you are going to be cutting it open, using some of the contents and then resealing it then you aren't wasting bag--but actually saving since you are reusing. LABEL! Always label what you store in your freezer, on the shelf, etc.--it really is amazing how you can forget or can't identify things if they aren't labeled correctly. ROTATE! Just because something is frozen does not mean it will last forever--frozen food has a freezer life just like canned food has a shelf life--freezing only slows down microorganisms it doesn't kill them, also taste, texture and nutrition does change over time.
Wednesday, August 7, 2013
Wednesday Why: Homeschool Resources
Wednesday Why: What are some of the materials and resources I use or have used for homeschool?
First off when deciding to homeschool a family will find out that there is a ton of possible resources to use for teaching pretty much any subject. Whether you want traditional books or online lessons and resources, there is an amazing amount to have to sift through to determine what works for you. I highly suggest reading reviews both the positive and the negative to find if a resource will work for you, but even with the reviews, you won’t really know until you try it. So, trial and error is really what every homeschooling family goes through to find what works best for them. And because of that, for the sake of the budget, you will want to personally look through and review as much as the material that you are considering using if at all possible. And it is possible, at least to a degree, by using library materials, or free online material (whether online websites or sellers that show some of the inside pages so you can get an idea if you would like it or not), or by asking around from friends, family or homeschooling associations. For buying, I find that amazon and rainbow resource center are often the cheapest--at least if buying new.
So what are some specific materials and resources I have used or use?
Phonics Pathways: If you need written-out lesson plans for teaching reading, this isn’t for you. This book has simple but effective lessons, with ideas on how to enrich them and use them.
Spelling Workout: Each lesson has a spelling list and then 4 or 5 activities that will test not just the spelling of the words, but also the meaning and usage of the word.
Saxon Math: If you need lessons that are very precise, including what to say, Saxon math will help you in teaching math. If you don’t like having a scripted lesson, Singapore Math or another math program may be better for you. *I only used K and 1 before deciding to not use them any more and use Singapore & Ray’s instead.
Singapore Math: These lessons are not scripted, so you will need to be able to look at what the lesson is presenting and script your own lesson out of it.
Ray’s Arithmetic: You will need to make your own lessons out of the material being presented. Due to the its age, some of the wording as well as tables of weights and measures, etc. are dated.
Spectrum Science: Contains brief reading sections and vocabulary, and questions to test knowledge and understanding of the reading and vocabulary. Doesn’t have a lot of fluff, experiments and so forth involved, including pictures. If you want a science book with photos, pictures, and prescribed experiments to do this isn’t for you.
Power Basics World History, United States History: Like Spectrum Science, there aren’t photos or many illustrations, and the lessons contain vocabulary lists and readings to understand major points in history with small quizzes within each lesson and tests to cover a series of lessons. Made for older grades, but can be watered-down to be used for younger grades by the teacher reviewing the lessons and simply teaching the main points they want to highlight.
These are just some examples of what I have used or am using and my thoughts on them.
Labels:
education,
homeschool,
Questions and answers,
Wednesday Why
Wednesday, June 26, 2013
Wednesday Why: How to use Fired-Up
Wednesday Why: How do I use Fired Up (or Insta-Fire)?
Fired Up can be used to start another type of fuel like wood or charcoal or it can be used on its own. Since the cost of using Fired Up exclusively to cook or bake is more than using charcoal or wood, I suggest using it to get the charcoal or wood started rather than to cook/bake the whole meal. The plus side of Fired Up over charcoal or wood is it can be stored indoors safely, it won't spontaneously ignite or explode. If it catches fire, it will simply burn with no blowing up. Also, it will still burn even if it is windy outside.
To use Fired Up as a starter for wood or charcoal: Place 1/2 to 1 cup of Fired Up on aluminum foil if using a charcoal chimney or can put directly onto volcano grill or charcoal grill bottom if want. Light the Fired Up. Place charcoal chimney with charcoal to light or wood to light over Fired Up & aluminum foil. To get the best use of the Fired Up, occasionally stir it. The 2 pictures below show the fired up being place directly into a volcano grill and onto aluminum foil with a charcoal chimney put over it. Both methods of getting the charcoal going worked, but the charcoal chimney worked better in my opinion.
To use Fired Up exclusively without wood or charcoal: Place 1+ cups of Fired Up in volcano grill/can stove/Firebox Stove, etc. The smaller grills/stove will likely use less Fired Up since you won't be heating as much space. Light and occasionally stir to keep it going and get maximum use out of it. Expect to use 1 cup of Fired Up for every 20-30 minutes of cooking you need.
In my own trials, even on a windy day, 1 cup of Fired Up burns for about 20-30 minutes. It doesn't light if it is water logged. I found it easier to get the charcoal going in a charcoal chimney rather than directly in the volcano grill/grill, even with using the Fired Up.
Fired Up can be used to start another type of fuel like wood or charcoal or it can be used on its own. Since the cost of using Fired Up exclusively to cook or bake is more than using charcoal or wood, I suggest using it to get the charcoal or wood started rather than to cook/bake the whole meal. The plus side of Fired Up over charcoal or wood is it can be stored indoors safely, it won't spontaneously ignite or explode. If it catches fire, it will simply burn with no blowing up. Also, it will still burn even if it is windy outside.
To use Fired Up as a starter for wood or charcoal: Place 1/2 to 1 cup of Fired Up on aluminum foil if using a charcoal chimney or can put directly onto volcano grill or charcoal grill bottom if want. Light the Fired Up. Place charcoal chimney with charcoal to light or wood to light over Fired Up & aluminum foil. To get the best use of the Fired Up, occasionally stir it. The 2 pictures below show the fired up being place directly into a volcano grill and onto aluminum foil with a charcoal chimney put over it. Both methods of getting the charcoal going worked, but the charcoal chimney worked better in my opinion.
To use Fired Up exclusively without wood or charcoal: Place 1+ cups of Fired Up in volcano grill/can stove/Firebox Stove, etc. The smaller grills/stove will likely use less Fired Up since you won't be heating as much space. Light and occasionally stir to keep it going and get maximum use out of it. Expect to use 1 cup of Fired Up for every 20-30 minutes of cooking you need.
In my own trials, even on a windy day, 1 cup of Fired Up burns for about 20-30 minutes. It doesn't light if it is water logged. I found it easier to get the charcoal going in a charcoal chimney rather than directly in the volcano grill/grill, even with using the Fired Up.
Wednesday, June 12, 2013
Wednesday Why: Why have a method for cooking without electricity?
Why have an alternative cooking source or two? How long do you really want to eat foods that are completely shelf-stable and don’t require cooking? After a major disaster it could be 1-4 weeks before full electrical power is restored, do you really want to eat granola bars and peanut butter and crackers that whole time? By having at least one alternative cooking method, a wider range of foods can be enjoyed during times without electricity, or simply just to save on the electric bill. To see the costs of various fuels involved in powerless cooking, see this post that I did last year. Going solar with solar ovens is the cheapest long term fuel source, but if you decide to go this route, you will probably want to choose at least one other cooking method for days when it isn’t sunny or too windy to use a solar oven.
I personally suggest choosing and having 2 or 3 methods: solar ovens, wood stoves/grills, charcoal stoves/grills, propane stoves/grills, butane stoves, sterno stoves, etc. And learning about each method to see which best suits your needs, storage abilities and usability. In some areas, you can’t store large amounts of any fuel-wood, gas, etc or use them because of housing restrictions. So before you buy, be sure you can use them in a safe manner--most can only be used outside (like charcoal and propane stoves, or like solar ovens).
Wednesday, May 22, 2013
Wednesday Why: Milky May Q&A
Milky May Q & A:
Is there a difference between the instant powdered milk from the store and the powdered dry milk from LDS home storage centers? Yes. There is a difference in recipe amounts, and ease of use. If a recipe calls for 1 cup of powdered dry milk, if using instant the amount will need to be doubled to 2 cups. Or vise versa if a recipe calls for 1 cup of instant powdered milk, use only 1/2 c regular dry milk. Instant dry milk mixes up quicker and easier than regular dry milk.
What is the storage life of dry milk, both instant and regular? When stored in cool or cold dark places and sealed in mylar bags or #10 cans (or other container that limits light, air and moisture), both instant and non-instant dry milk store up to 20-25 years and still sustain life, but for best taste & nutritional value use within 3-7 years. Once opened, if still stored in a cool/cold place they can store for up to 2 years. If stored in higher temps and humidity whether sealed or opened, the storage life drops dramatically (even as low as 3 months).
How much milk does one #10 can of dry milk powder make? A #10 can of dry milk from the LDS Home Storage Center can make between 4 and 5 1/2 gallons worth of milk. The difference comes from how much you can into a can and how much you are using to make a gallon of milk--more or less than the directions say. For the cans of dry milk I have canned at home, I measured and got 5 1/2 gallons worth of milk.
Can I use powdered milk in recipes that call for milk? Yes! You can either make the milk and have it ready or simply add the dry milk powder to the dry ingredients and the water to the liquid ingredients.
How can I make drinking milk made from dry milk taste better? Adding a little vanilla to the milk may help it taste better--I've done this multiple times and have liked the taste. I’ve also heard of people adding both vanilla and a little sugar. Some people also use more or less powdered milk than the directions say to get the taste they like--I like it when making 3 qt adding only 2 c of dry milk instead of the 2 1/4 it would normally call for. Another option is to mix it with store bought milk--in whatever proportions you like. Whatever you add or don’t add, chill the milk! Freshly made warm milk does NOT taste good.
How much should I store? The general guidelines suggest 16 lbs of dry milk powder per person per year. This is the equivalent to 1 cup of milk a day for that person. If pregnant, nursing or young child you will want to store more to meet the nutritional needs.
Are there any alternatives to dry milk? Yes. But, the downside to most of the milk alternatives, besides being expensive, is that they don’t have the storage life of regular dry milk, so you will need to be sure to rotate through it faster. But here are some options: soy milk powder, canned/liquid soy milk (I’ve seen some that is shelf stable until it is opened) or you could learn about how to store soy and making your own soy milk, evaporated goat milk.
What does dry milk look like? Instant dry milk looks more like little balls, while powdered dry milk is powder.
Left: instant powdered milk
Right: non-instant powdered milk
(lighting isn't very good, but pics show the difference in texture)
Monday, May 13, 2013
Milky May Monday: General Dry Milk Information
Milky May...For May, inasmuch as I am able to post, I plan on focusing on food storage milk products, particularly dry milk.
So how is dry milk made? Briefly: milk is gathered from farms, transported to a creamery where it is put into holding tanks that filter the milk which is then tested to meet quality standards. The milk is then evaporated some (this pasteurizes it) and then the cream is separated from the milk. It is now skim milk. The milk is then standardized, meaning it is mixed to have a consistent product--every batch being the same-whether it is whole, 2% or skim milk being made. The evaporated & condensed milk that is remaining from this process is then standardized, then dried into a powder-by a spraying/drying process. It is packaged and sold. (for more in depth information see http://www.usaemergencysupply.com/information_center/powedered_milk_made.htm)
Wednesday, April 3, 2013
Wednesday Why: Water Storage Q&A
April Showers...More on Water
Water Q&A: I often get asked questions about home storage and preparedness, here are a few about water and water storage that I've been asked over the years.
Why should we store drinking water besides obedience to wise counsel? It simply makes sense because we cannot live long without water. If the water source becomes contaminated or is completely disrupted, you will need water to sustain you until the water is safe to drink again. It is so much better to prepare 5 years in advance to any emergency, than 5 minutes too late. Failure to prepare is choosing to be dependent on others during crisis and choosing to possibly not have your needs met and thereby getting sick or dying.
Why do people neglect to store water? Some possible reasons people may not be storing water are: Space! Water takes up a lot of space. Cost. Quality containers cost money, as do filters and such. Uninformed: missed warnings and counsel that come from multiple sources. Uninformed: don’t know how to best store water. Lack of desire to prepare oneself for emergencies. Want to rely on others--”My____has food & water storage, I’ll just go to their house in an emergency.” (and thereby lessen their resources).
What is the best way to store water? Actual drinking water stored in leak proof food grade containers that limit light and stored in a cool dark place is the best way to store water. Container size is an individual choice, but generally speaking the larger containers can store more water in less space than smaller containers. Small containers are nice to have if need to move it around. Beyond drinking water, storing filtering systems and their parts, chemical treatments and/or other materials needed to purify water are another good way to prepare for water shortage/contamination emergencies.
How much water should I store? 1 gallon of water per person per day. Increase this amount if living in an area of high heat or if have health concerns that require you to have more water (like pregnant or nursing, diabetes,etc.). Store at least 3 days to 2 weeks worth of water at home. In an emergency where water is limited or contaminated you probably won’t be sorry for the space you used to store water.
Can I use milk jugs to store water? Yes, but be aware the plastic breaks down quickly so it is only a short term option--as little as 3-8 months before the jug should be replaced. Also, be sure to completely clean them and use a bleach/water solution to sanitize them before filling with water. There are much better options, including pop bottles, water barrels, and water bottles.
Can I use bleach bottles or laundry detergent bottles to store water? No, at least not for drinking water. They could possibly be used to store water that will be used for washing clothes or cleaning, but should NEVER be used to store water to be used for drinking.
Can I store my water barrels outside? Yes. But beware it is subject to the elements--high or low temperatures, light and such. Outdoor storage is not ideal, but it can be done, just be sure to purify it periodically or before using it since bacteria thrives in light and heat. Also be sure to store the water off of cement.
Can I store water containers on cement? Containers should be off cement, either by simply placing on pieces of wood or by putting on a shelf.
Can I just store water filters or purifying tablets rather than storing drinking water? These are good to have on hand and know how to use, but remember you have to have a source of water to use these, so if you have no drinking water and no water source nearby, then having only these may not be affective without travel or other method of obtaining water. I personally suggest having at least a 3 day to 2 week store of drinking water (at least 3 days, but as much beyond that that you have room for) and then having the knowledge/skills and materials needed to purify water should you need it beyond what you have stored.
Do I need to transfer bottled water into a different container? No. If you buy bottled water, store it in its original container, then just be sure to check it periodically for leaks, discoloration or odors.
How often do I need to rotate through my water storage? It depends on the container and where it is stored. If using milk jugs, you will need to rotate within a few months to as long as a year. If using pop bottles or other plastic bottles (like that of bottled water), you will want to rotate every 1-2 years. If using large barrels or other food grade containers made for water storage, and they are stored in cool, dark places; it is wise to rotate every 3-5 years. Though technically if the container is sanitized, doesn't leach/leak, etc and the water was purified, the water can store for much longer.
All water storage should be checked periodically for leaks, discoloration, & odors. If there are leaks, bacteria can get in. If there is discoloration or odor it is likely a contaminant of some sort got in or the container itself is leaching something into the water.
Wednesday, March 6, 2013
Wednesday Why: Home Storage Sacrifices
What are some possible sacrifices to get & maintain a home storage? In order to get and maintain a home storage, there will be sacrifices in money, time, space and possibly in changing eating habits in order to incorporate and rotate the food storage.
Money: food, toilet paper, fuel and pretty much everything else you would include in a home storage costs money. Most of us don't have lots of money to work with, so buying items for home storage may be a small or a big sacrifice. We shouldn't go into debt to get home storage items. But we can and should do what we can--whether it is 1 extra canned good a week or 1 pound of beans a month, most of us can do something. Instead of using money for entertainment using it for home storage can be a sacrifice to many people--whether it means using the money that would have been spent to go to the movies or the money that would have been spent for cable/satellite. There may be other things we go without so we can get some home storage--like no new clothes or making more meals at home instead of eating out.
Time: canning and preserving your own food takes time, as does sealing food into cans or mylar bags. It also takes time to plan your home storage and inventory it. And to get a year supply, it certainly takes time and patience. To learn & practice how to use & rotate your food or other home storage items will take time too.
Space: where are the home storage items going to be put? Giving up space to put home storage can be a big sacrifice too. There are ways to make it look nicer and be more accessible, but no matter where you store your stuff, you are giving up space for it.
Eating Habits: By getting long-term supply foods that sustain life, many people may need to learn how to use and make those items in a tasty way which means learning and eating it. If you aren't used to eating and using wheat or beans or dried foods, learning to incorporate them may seem like a daunting task. It may mean big or little changes in eating habits.
When we wisely use our money, time and other resources to get a home storage we may feel like we are sacrificing. I know though that those minor and major sacrifices can be worth it--whether a major disaster happens, a loss of job or simply being able to have on hand something that is needed and not having to run to the store everyday.
Wednesday, February 20, 2013
Wednesday Why: Adapting Food Storage to Individual Family
What are some ideas on adapting food storage to different dietary needs, whether those needs are simply that more/less of a specific item is needed or the needs are for alternatives if there are allergies?
Adapting Food Storage to Individual and Family Dietary Needs
When considering what to store, individuals and families should consider their needs and limitations in foods. Children, pregnant or nursing mothers need more calcium & protein foods like milk. Are there allergies (wheat, milk, eggs, etc), diabetic or other health needs and concerns? Below are some ideas on substitutions and additions when considering these types of things. I am not an expert on these, you will have to follow the advice of your doctor and find things that are shelf stable that meet the type of diet you follow & need. Whenever there is an allergy or diet restriction you should always check labels carefully--both for the ingredients/nutrition information and for the expiration date. Things like wheat, nuts, milk, corn, carrots, etc. pop up in places you wouldn’t think--so check the labels. If you have diet restrictions and concerns it is very wise to keep product labels to refer to in the future for tracking ingredients, sugars, sodium, etc. Also be aware that the substitutes often cost more and don’t store as long so be sure to budget for them and plan for rotation.
Wheat Allergies: Other options for whole grains/seeds that can be ground or eaten whole: rice, oats (check for gluten free), quinoa, millet, buckwheat, amaranth, corn, wild rice, flax seeds and any other grains/seeds that you have tried and liked. Think of what you already use for flour or grains--can you find it in its whole form? If not, you can stock up on the flour form, but be aware the shelf-life won’t be as long as that of wheat or even the grain in whole form so you will need to rotate through it much faster.
Milk Allergies: The downside to most of the milk alternatives, besides being expensive, is that they don’t have the storage life of regular dry milk, so you will need to be sure to rotate through it faster. But here are some options: soy milk powder, canned/liquid soy milk (I’ve seen some that is shelf stable until it is opened) or you could learn about how to store soy and making your own soy milk, evaporated goat milk.
Egg allergies: Some alternatives to egg powder/crystals: unflavored gelatin or flax meal can be used to substitute eggs in baked goods. Also for sweeter baked goods like pancakes or muffins, you can use mashed banana or applesauce to replace the egg, but be sure to increase slightly the baking soda/powder amounts as bananas and applesauce don’t help rise the baked good like an egg would. There are other substitutes as well, commercially made as well as homemade substitutions that you may already be aware of--simply stock up on the ingredients (checking labels and expiration dates of course) and rotate.
Legume allergies: you can store meats and fish instead of legumes. Canned or dehydrated/freeze dried.
Low-fat, Low-sugar, Low-sodium diets (diabetic, heart concerns, etc): Follow Dr recommendations. When storing foods--check the ingredients and labels! Many, many canned goods have lots of sugar and/or sodium; but more and more you can find “low-sodium” options or fruits canned in juice not heavy syrup. As far as storing wheat, beans & oats, these are low fat (and what fat there may be is the good kind of fat), low sodium, high fiber & protein foods that are good for the heart and body, that shouldn’t cause crazy blood glucose changes as long as they are eaten in moderation. Also, store veggies (dehydrated don’t usually have the added salts/sugars).
For all food storage, whether storing regular food items or substitutions/diet specific foods gather a variety of recipes that you like that use the food items you will be storing and meet your dietary needs
Wednesday, February 13, 2013
Wednesday Why: Choosing a Pressure Canner
What are some things to consider when choosing a pressure canner?
Pressure canners come in a variety of sizes and also styles. Some are smaller than others, which is nice if you have a small stove area to work with or don't plan on doing big batches. The bigger ones are nice if you do have the space and you want to do big batches. Also remember the bigger it is, the heavier it will be both empty and filled with water. I personally recommend putting the canner on the stove and filling it with water there by using a pitcher, rather than filling the canner in the sink and then moving it to the stove--especially if you have a smooth-top stove--as moving it when it is filled can scratch or do other damage (besides being heavy). Another thing to consider is the height--some range hoods are low and so the taller pressure canners may be too big, if this is a concern measure the space between the stove and the hood to be sure to get a pressure canner that will fit.
Some canners don't have gaskets (All-American) while others do (Presto & others). Gaskets do break down over time and will need to be replaced periodically, so take that into consideration when choosing your pressure canner. Consider the cost of replacement when considering over-all price.
Another thing to consider is whether or not the pressure canner is ok to use on your stove. Many clearly state you shouldn't use them on smooth-top/glass-top stoves, while others may not mention one way or another, if you have a smooth cooktop stove it is best to stick with the ones that indicate they are safe and ok to use on them. Why is this important? If you use a pressure canner that isn't cooktop safe, it could damage your cooktop. Also, if you have a warranty on your cooktop, some warranties can and will be voided if you use a pressure canner on it & it gets damaged because of that. Presto makes a pressure canner that they claim can be safely used on both regular and smooth top stoves.
With all pressure canners, you should check the gauge(s) regularly to make sure they are working correctly. Local extension offices can usually help with this or if you have a pressure canner service center nearby that might be an option too. Also, be sure to follow the instructions for the type of pressure canner you have/get, there are differences that can and will affect their usage.
Have fun canning! Pressure canners widen the scope of canning--not just fruits/jams and tomatoes anymore, but veggies and meats too! Pressure canners can be used as water bath canners, or you can have both a pressure canner and a water bath canner--you can be canning meats while canning jam.
Pressure canners come in a variety of sizes and also styles. Some are smaller than others, which is nice if you have a small stove area to work with or don't plan on doing big batches. The bigger ones are nice if you do have the space and you want to do big batches. Also remember the bigger it is, the heavier it will be both empty and filled with water. I personally recommend putting the canner on the stove and filling it with water there by using a pitcher, rather than filling the canner in the sink and then moving it to the stove--especially if you have a smooth-top stove--as moving it when it is filled can scratch or do other damage (besides being heavy). Another thing to consider is the height--some range hoods are low and so the taller pressure canners may be too big, if this is a concern measure the space between the stove and the hood to be sure to get a pressure canner that will fit.
Some canners don't have gaskets (All-American) while others do (Presto & others). Gaskets do break down over time and will need to be replaced periodically, so take that into consideration when choosing your pressure canner. Consider the cost of replacement when considering over-all price.
Another thing to consider is whether or not the pressure canner is ok to use on your stove. Many clearly state you shouldn't use them on smooth-top/glass-top stoves, while others may not mention one way or another, if you have a smooth cooktop stove it is best to stick with the ones that indicate they are safe and ok to use on them. Why is this important? If you use a pressure canner that isn't cooktop safe, it could damage your cooktop. Also, if you have a warranty on your cooktop, some warranties can and will be voided if you use a pressure canner on it & it gets damaged because of that. Presto makes a pressure canner that they claim can be safely used on both regular and smooth top stoves.
With all pressure canners, you should check the gauge(s) regularly to make sure they are working correctly. Local extension offices can usually help with this or if you have a pressure canner service center nearby that might be an option too. Also, be sure to follow the instructions for the type of pressure canner you have/get, there are differences that can and will affect their usage.
Have fun canning! Pressure canners widen the scope of canning--not just fruits/jams and tomatoes anymore, but veggies and meats too! Pressure canners can be used as water bath canners, or you can have both a pressure canner and a water bath canner--you can be canning meats while canning jam.
Wednesday, February 6, 2013
Wednesday Why: Why Water?
Why Water? Why should an individual or family store water as part of their home storage? The simplest answer is water is essential to life. I have posted on water in the past, but thought it time to repost as a reminder about storing water. Below are some basics to storing water.
During storms, natural disasters or other emergencies like water pipes bursting, the water supply may become disrupted or contaminated. For this reason, it is wise to have on hand a 2 week supply of water for each person in the home. 1 gallon per day is the minimum (if it is really hot weather, or other health concerns like diabetes, double the amount). Water is your most precious survival item, without water you cannot survive for much longer than a few days whereas you can live without food for longer. With unclean water, you may contract diseases that could lead to death or at least an uncomfortable existence. With no water, you will die after a few days, or at least sustain permanent kidney damage or other problems.
When a major disaster happens, it is safe and wise to assume the water is unsafe without further purification, as many times disasters can cause contamination of some sort to the water supply. Immediately after a major disaster (earthquake, tornado, whatever), shut off the water supply to your home at the valve that goes to the water main outside. This step helps in keeping possible polluted water out of the house's water supply.
Storing water is a big undertaking, but essential. Water takes up space, lots of it. And it is heavy, so think through how you will store it, in what types of containers.
Storage of water:
Keep water in a cool, dark place if possible. If in the garage (where can get warm) at least cover with black garbage bag to get it dark. Store AWAY from fumes and gases, chemicals, pesticides, etc. and off the concrete floor, you can put it on shelves or wood. Periodically check water storage for cloudiness, odor, leaks, etc. replace as need. Otherwise water, if stored properly, should store indefinitely. During cold climates, don't fill containers completely in case the water freezes, you want room for it to expand.
There are small and large containers used to store water. What you choose will depend on your space, your preference, and cost of course. A gallon of water weighs about 8 pounds. Water storage will take up a lot of space, so you will want to learn how to purify water as well. Think of it this way, a year’s supply of wheat uses less space than a 2 week supply of water!
55+ gallon drums hold a lot of water, but when filled are heavy!! Too heavy to move without emptying it some (55 gallons at 8 pounds a gallon is 440 pounds). But it stores a lot in less space than say one gallon jugs. (You’d need 55 gallon jugs to have the same amount of water that fits in one 55 gallon drum). So in the case of a larger family, drums might be the way to go since they are more space friendly. But, because they can’t be moved easily, you may want some smaller containers as well, in case you need to leave your home. This would be wise for the 72 hour kit—to have smaller containers, plus ways to purify.
Containers:
All containers should be food grade. Cleaned thoroughly—sanitized (see below). Leak-proof.
Milk jugs: can be used for shorter periods of time, the plastic begins to break down over time. They tend to leak within a few months to a year, depending on where and how stored.
Pop, juice, syrup, etc. bottles: a good choice for smaller containers, oddly shaped though and can’t be stacked easily, so take up more space.
Drums: large, space efficient in some respects, costly at the get go, but the cost might be worth it in space saved… Will also need a bung wrench and pump to remove water stored in them. HEAVY when filled.
Other containers: don’t use metal (it can corrode, rust), glass can break and is heavier than plastic, containers that contained cleaning agents, etc
Sanitizing containers to be used: wash + rinse bottles thoroughly. Fill with about 1 qt water, add ¼ c. bleach. Put lid on, shake vigorously and turn upside down to get the cap too. Let stand 2-3 min. Pour bleach water into next container to be sanitized and repeat process. (same water can be used for more than one container). After containers have been swished with bleach water, fill with purified water, label (be sure to label that it was purified water and the date it was prepared).
Methods to purify:
Boil: most preferred, easiest. Boil vigorously 5-10 min. Cool, pour between clean containers to aerate.
Distill: extension to boiling. Boil water and collect the water vapor that condenses on the lid. This water won’t have other impurities. Fill large pot with water. Tie a cup or small pie plate to handle of pot lid (lid will be upside down, cup upside up, but not touching water being boiled). This method also works to make fresh water out of salt water. Instead of boiling, can use sun to heat water--will take longer.
Filters: commercial filters, follow directions
Chlorine Bleach: don’t use if cloudy* water or other noticeable sediments. Must first remove all large particles (filter water through cloth, several layers, several times if need, then chlorinate). 1/4 to 1/2 t per gallon of water let stand 30 min, should have a slight chlorine odor, if not repeat and let stand 15 min. before using. Use fresh bleach, if it is older, you will have to double the amount. If too much chlorine is used, cramps, vomiting or diarrhea can be a problem.
*if water is cloudy, first try to filter as noted, if still cloudy double the amount of bleach.
Other chemical treatments: water purification tablets: check types/purposes/what they purify against, etc. also check expiration dates. Follow directions and allow sufficient time for the chemical to work before you try to use the water.
Water sources in & around the home:
Water heater (turn off gas/electric supply, close main water valve, open water faucet, drain water from drain plug at bottom—don’t turn on electric or gas until intake valve reopened and tank is full of water again)
water softener containers, toilet tank
Canned fruits and veggies, juices, soups, other high moisture foods.
If more than one level to home: drain water that is in your pipes (turn off main water supply first, open a faucet on top floor and open faucet on lowest level—to collect any water left in pipes).
Dew in the morning: mop up with clean T-shirt or towel and squeeze into clean container, purify by boiling or other methods.
make a still in yard: use to collect water from the ground that is evaporating. dig a hole, and using plastic, rocks, container and if have a clean tube, collect distilled water. Uses heat from the sun to cause evaporation and distillation of water. If don’t have a big hole, can use two pots (on inside of the other, or a glass jar inside a pot, with the plastic weighted down like below. 2 stills should provide enough water for 1 person each day.
Water from plants: wrap a tree branch or other plant with plastic, water will condense onto plastic; also certain types of plants indicate water in the ground around it (still have to remove and purify).
Wednesday, January 16, 2013
Wednesday Why: Dehydrators
What are the benefits of having a dehydrator? There are different ways to dehydrate food, you can sun-dry, use the oven or even a microwave (though I haven’t tried that yet), use a sun oven, and of course dehydrators. Some of the pros of using a dehydrator can include being able to control the temperature, keeping the bugs away, not as much energy as an oven. The cons--well some dehydrators can be loud, they do take up space on the counter and depending on the type, the initial cost can be high. By dehydrating food, you can store more in less space--yeah!
What should be considered when choosing a dehydrator? When deciding whether to buy a dehydrator or not and which type/size, you will want to think about how often you will be using it and how much at once will need to be dried, what kind of foods you want to dry and cost. If you don’t garden, you may not be using it as much. But then again you may if you buy produce in bulk or on sale regularly. Do you plan to make fruit leathers, jerky, dry herbs, or simply dry fruits and veggies? Some dehydrators are better than others. Dehydrators come in different sizes and some are able to expand if you want to have adjustable sizes. Some dehydrators are limited into the size of the food that can be dried, whereas others have trays that can be removed to allow for larger food like when making yogurt or raising bread. Another thing to consider are the features: temperature dials, digital controls, timers, etc. I personally don’t think a timer is as important as a temperature dial, since I don’t plan on having the dehydrator start/stop when I can’t be there to do so. Whether you prefer dial or digital temperature control is up to you. Also some dehydrators claim to be faster, and perhaps they are, but personally that isn’t a factor to me as you don’t want your food to case-harden (where the outside hardens and doesn’t allow the inside to dry) which can happen if you are drying at too high a temperature (because of trying to make the drying go faster).
Accessories: I highly suggest getting mesh screens for your trays--some are labeled as mesh screens (like for a L’Equip) others have fancy names like “clean-a-screen” (Nesco models). They make clean up so much easier!!! You can easily make your own mesh screens--craft stores sell the plastic mesh stuff (ahh those not so forgotten tissue box holders made from mesh screen and yarn--yep it’s basically the same stuff, I’ve used both the commercial ones and the craft store ones they perform around the same). Also most dehydrators come with a limited amount of fruit leather trays, if you plan to make a lot of fruit leather, I would buy the accessory fruit trays to up the amount of leathers you can make at once.
The final decision: If you have friends or family who have dehydrators, I highly suggest asking them if you can try them to see if you like them before buying. Otherwise, if you are unable to try for yourself, do your research, think about size, capacity, features (best to have temperature control), quality (look at warranty), what you plan on using it for & accessories as well as the cost. What of these will be most important to you? If cost is most important, you will most likely be looking at bottom or top mounted because they are the cheaper dehydrators generally. If quality is your most important aspect, look for those with the longest warranties and the best reviews. If capacity is the biggest deciding factor, rear-mounted and expandable dehydrators are your best option (with rear-mounted allowing for large doings like making yogurt and raising bread). If you plan on doing meats at all, you will want a dehydrator with temperature control.
Types of Dehydrators: There are dehydrators with the motor/fan on the bottom, top or in the back. There are pros and cons to each.
Bottom mounted fans: juices can and will drip down, so be sure you are willing and able to clean up the mess--as bottom mounted fans will have to be cleaned with a cloth rather than running under water or in a dishwasher. Many bottom mounted fans do allow for expansion by buying extra trays. So that is one positive of many of the bottom mounted fan dehydrators.
Some examples include: L’Equip food dehydrators. I haven’t personally used these, but have researched them and read reviews--overall they seem to be a good choice for bottom mounted fans. Based on what I have read, it has one of the longest manufacturer’s warranties available (12 years on some models). These run around $100 to $150, depending on model and accessories.
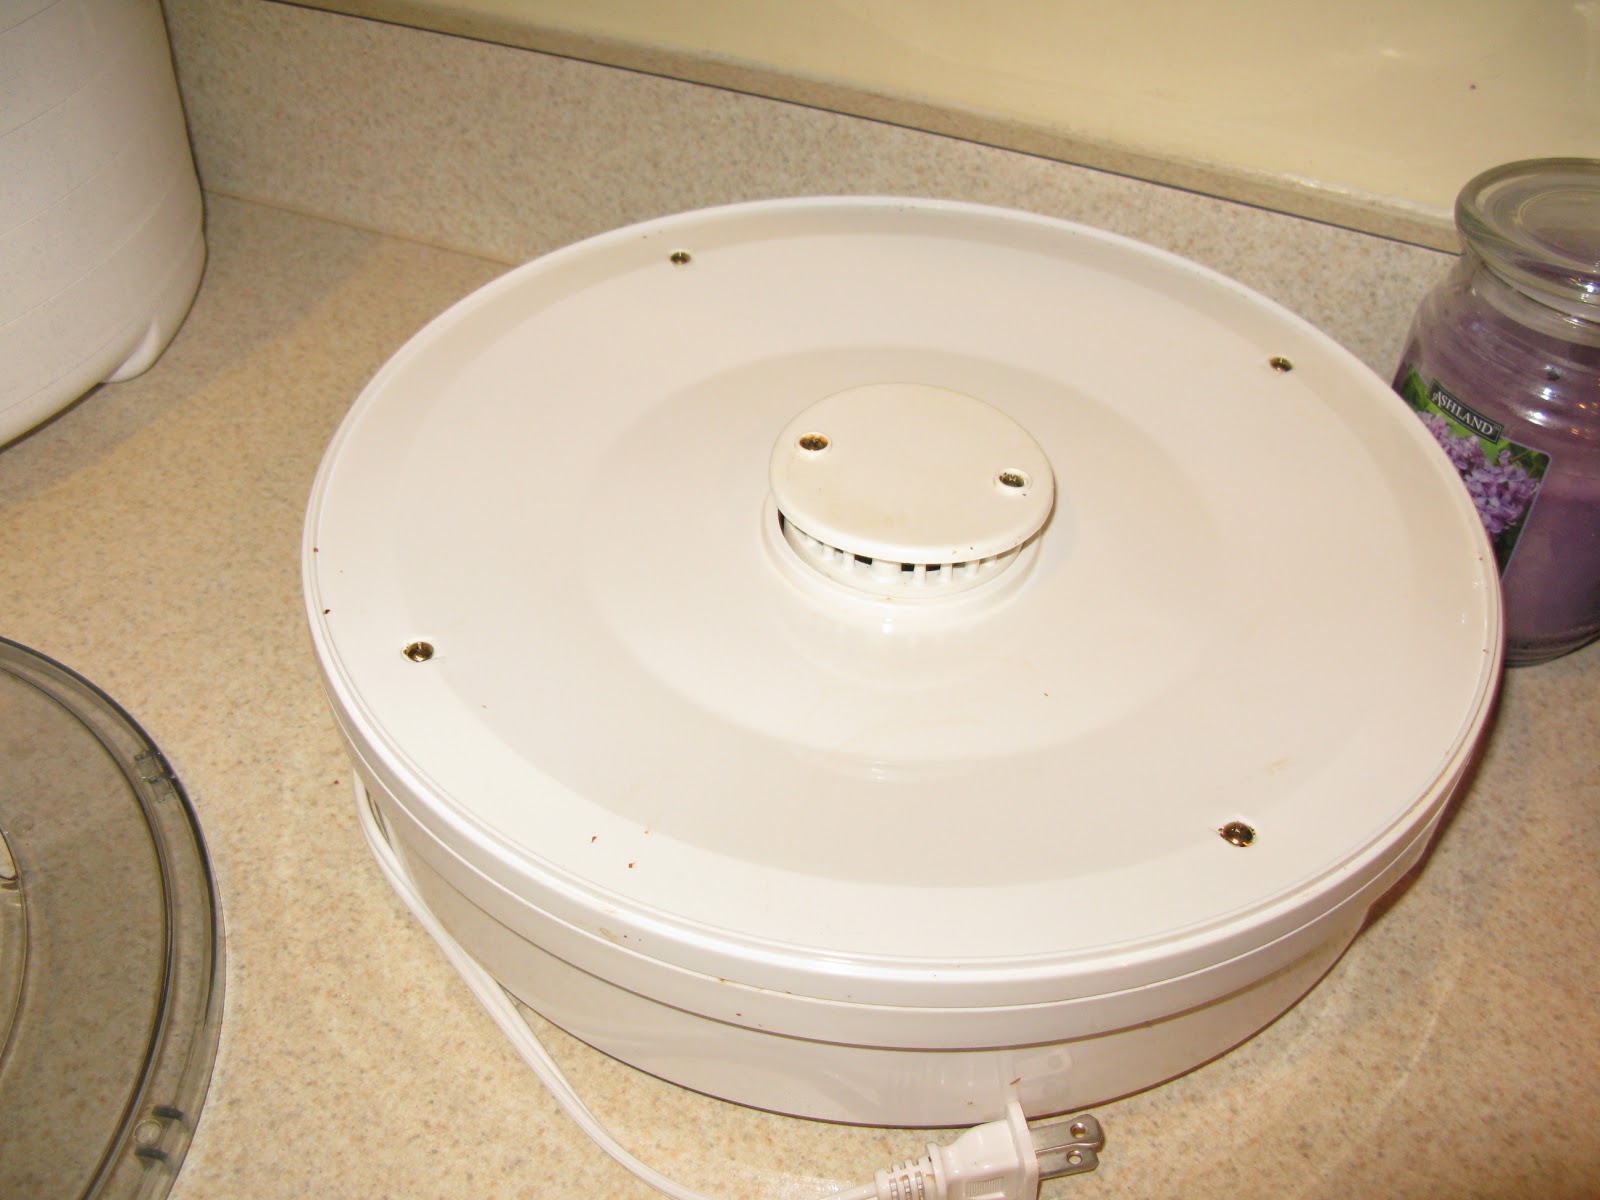
As far as bottom mounted fan dehydrators go, I’ve only used a generic (Durabrand) one from Walmart years ago (for about $15 or $20). It does fine with fruits, veggies and fruit leathers, but I wasn’t brave enough to try meats because it doesn’t have a temperature control and meats should be done at a higher temperature. It has lasted over 10 years with periodic use, so even generic ones can and will work. Cleaning the base that housed the fan, wasn’t too bad--I usually left a damp cloth on the juices for a bit to help loosen them up, and they usually cleaned up rather easily. See pics of before cleaning and after:
This was from when I dried frozen strawberries, quite a mess, but it cleaned up nicely too. The fan sits a little above so no liquid got into it.
Top mounted fans: the juices that drip down will go onto a bottom tray thing that can be washed submersed in water if need be. Many top mounted fan dehydrators can be expanded by buying more trays.
Some examples include: Nesco food dehydrators. There are a variety of models, but most of the ones I’ve come across have good reviews. I personally have used one, it does great with fruits, veggies, leathers, and meats. There is no on/off switch though--to turn on you plug it in, to turn off you unplug--not a big deal for me, but if you prefer on/off buttons/switches this isn’t the one for you. The trays clean easily. These dehyrdators usually run around $30 to $100, depending on model and accessories. Price-wise, the Nesco brand gives a lot for your money.
Rear mounted fans: These hype that they are better than any other type of mounted fan, and perhaps they are. My personal experience was that when compared with the top mounted Nesco, it didn’t seem to be all that big of a difference. BUT, the biggest benefit to these types of dehydrators is that usually you can remove any number of trays to do things like making yogurt or raising bread loaves--a big plus if you plan to use a dehydrator to do these things. Also, depending on the size (number of trays) you have more drying space than the often smaller bottom or top mounted fan dehydrators. A negative is these types are big, they take up quite a bit of counter space compared to other dehydrators.
Some examples include: The number one favorite: Excalibur! Great reviews, again one of the longest warranties available (10 years) and a dehydrator’s favorite for years. Prices for these run around $150-400, depending on model.
I haven’t used the Excailbur, but would like to someday:). I did try a rear mounted fan dehydrator from Cabela's, that has a similar design in that it has 10 trays, rear mounted fan, dial temperature control. I like the clear hinged door on Cabela’s dehydrator--I could see the food and monitor its drying. The cons of this Cabela’s dehydrator over Excalibur (at least in my point of view) are: this model did not come with mesh screens or fruit leather trays; I had to cut some craft mesh screens to size (not a problem at all to do so); and have yet to figure out or try making fruit leather screens (maybe plastic wrap?) whereas the Excalibur does have these available if not when you buy it, at least as accessories. The model I tried was a sale deal model so that may be why it didn’t come with accessories. Another model sold currently is around $200 and that one does have accessories available.
Note: prices are based on price of unit, they do not include any shipping and handling. Most prices came from Amazon, except for Cabela’s.
Subscribe to:
Posts (Atom)